Are you ready to sprinkle some magic into your next celebration? Imagine creating enchanting DIY lip balm party favors that are sure to impress your guests. With the Lip Smacker Disney Princess Flavored Lip Balm Party Pack, you can unleash your creativity while offering a delightful treat that’s both fun and functional! Whether it's for a birthday bash, a themed party, or just a whimsical get-together, these charming lip balms will leave a sparkly impression.
Crafting your own lip balm favors opens the door to endless fun! The variety of flavors inspired by beloved Disney princesses adds a special touch that can cater to every little guest’s taste buds. As you gather your supplies and dive into this colorful DIY project, you’ll create memorable keepsakes that perfectly embody the spirit of joy and adventure. Let's embark on this creative journey, and transform the ordinary into the extraordinary!

The Lip Smacker Disney Princess Flavored Lip Balm Party Pack features a delightful collection of 8 lip balms designed specifically for kids. This charming set includes flavors inspired by beloved princesses, making it an ideal party favor for birthdays or themed events. Each balm is not only fun to use but also helps keep little lips moisturized, creating a blend of enjoyment and care. Packaged to capture the hearts of young fans, these lip balms promise to be a hit at any gathering!
Choosing Your Ingredients
Creating a DIY lip balm party favor using Lip Smacker Disney Princess Flavored Lip Balm is a delightful and creative endeavor, especially for kids’ parties. Let’s start with the essential ingredients you will need to ensure a fun and safe experience. Focus on skin-safe and kid-friendly components to keep the little ones delighted without any risk. You can start with the core ingredients of the lip balm itself, which typically include a blend of wax, butter, and nourishing oils. Natural ingredients such as beeswax, cocoa butter, and coconut oil are excellent choices as they provide moisture and protect delicate skin. Make sure to source organic ingredients whenever possible for a healthier option.
Next, consider the flavors and colors that align with your party's theme. Lip Smacker offers an array of enchanting flavors inspired by popular Disney Princess characters, such as strawberry, cherry, and blue raspberry. You could also mix in a few drops of natural flavor extracts like vanilla or peppermint to add a unique twist. When it comes to color, using natural colorants like beet juice for pink or spirulina powder for green can add a vibrant touch while remaining kid-friendly. Always ensure that any additives you choose are skin-safe, non-toxic, and appropriate for children. For the finishing touches, think about packaging—clear tubes with fun stickers or labels themed to the party can make your DIY lip balms even more appealing.
- Beeswax – for a protective barrier
- Cocoa butter – for smooth consistency
- Coconut oil – for hydration
- Flavor extracts – like vanilla or peppermint for a twist
- Natural colorants – such as beet juice or spirulina for vibrant colors
- Fun, themed packaging – to match the party's theme
Gathering Supplies
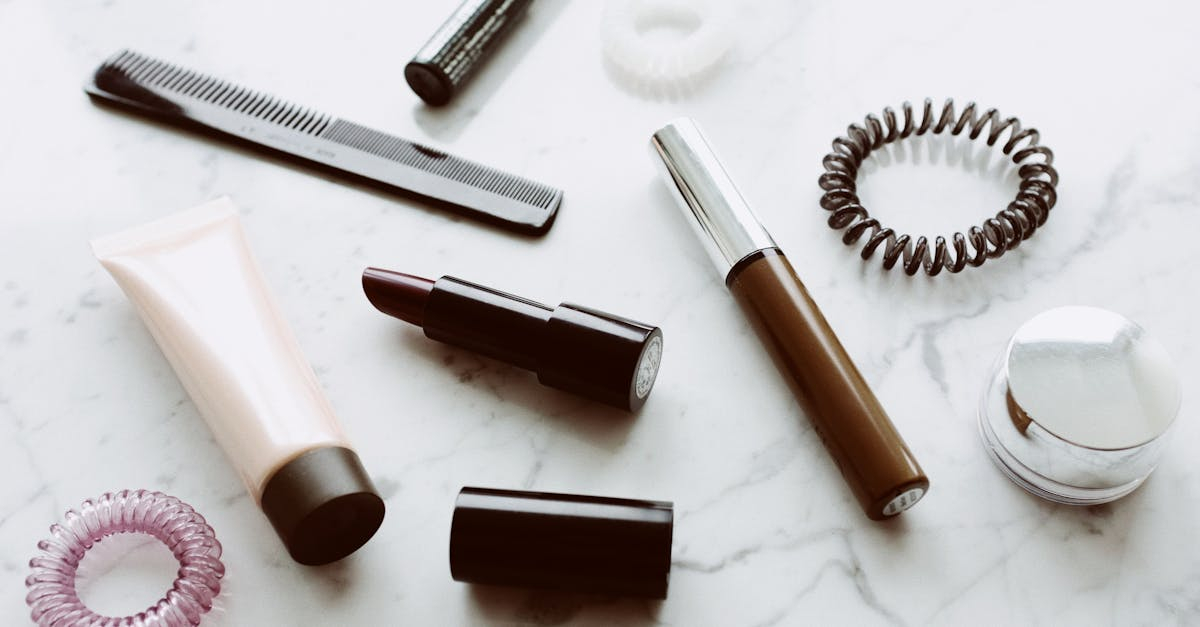
Getting ready for a DIY Lip Balm Party Favor project using the Lip Smacker Disney Princess Flavored Lip Balm Party Pack can be a fun and creative process! To start, gather all the materials you will need to make this enjoyable and successful. Essential items for your lip balm creation include the Lip Smacker Disney Princess Flavored Lip Balm itself. This party pack contains eight different flavors, ensuring each guest gets a unique taste of the magic.
Next, consider the containers to hold your lip balm. Small tins or jars can work perfectly; look for cute, themed containers that complement the Disney Princess aesthetic. For mixing the lip balm, you’ll also need utensils like a mixing spoon or spatula. A heat source is essential for melting any additional ingredients—if you plan to customize the lip balm with other natural ingredients, a microwave-safe bowl or a double boiler will serve you well. Here’s a quick checklist:
- Lip Smacker Disney Princess Flavored Lip Balm Party Pack (8 Count)
- Small tin or jar containers
- Mixing spoon or spatula
- Microwave-safe bowl or double boiler
- Labels for personalizing the favors
- Decorative elements like ribbons or stickers
Finding these supplies can be easy! Check out local craft stores like Michaels or Hobby Lobby for the containers and decorative items. Online retailers such as Amazon or Etsy also provide a vast selection of themed packaging that can save you time. Using these resources will kickstart your party favor crafting adventure!
- Online craft websites
- Dollar stores for budget-friendly options
- Local party supply shops for themed materials
Creating Flavor Combinations
Mixing and matching flavors for your DIY Lip Balm Party Favors using the Lip Smacker Disney Princess Flavored Lip Balm Party Pack can be a fun and creative endeavor. This 8-count collection offers a colorful variety of fruity and sweet flavors inspired by popular Disney Princesses, making it the perfect base for experimenting. Get those taste buds ready as you dive into creating magical flavor combinations that kids will love. Think about the themes of your party, or try pairing flavors that reflect the interests of the kids attending. Here’s how to get started:
- Choose a Theme: Consider themes like “Royal Treats” with flavors like Strawberry (from Cinderella) and Raspberry (from Ariel) to evoke feelings of enchantment.
- Layering Flavors: Create layered effects by mixing a sweet fruity flavor with a minty one. For instance, combine Cotton Candy (from the collection) with Mint Chocolate (from another Lip Smacker range) for a refreshing treat.
- Color Coordination: Picking flavors based on color can be a playful approach. Try Lemonade (from the collection) with Blueberry for a vibrant combination that echoes a summer day.
Here are some unique recipes to inspire your mixing:
- Mermaid Delight: Combine Watermelon and Mermaid Berry for a refreshing, seaside-inspired balm.
- Sparkling Sunset: Blend Peach and Mango for a tropical vibe that takes kids on a flavor vacation.
- Royal Berry Bliss: Mix together Strawberry and Grape to create a sweet, berry-filled experience reminiscent of a royal feast.
- Fairy Garden Party: Pair Cherry with a hint of Vanilla, adding floral essences for a whimsical garden flavor.
Encourage little ones to get creative and try out their own blends. They might just discover their new favorite flavor!
Melting the Base
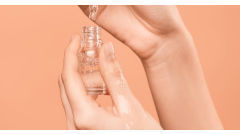
Creating DIY lip balm party favors with Lip Smacker's Disney Princess Flavored Lip Balm is a fun and exciting activity! The first step in this process involves melting the base of the lip balm to create a smooth and luscious texture. There are two popular methods for melting lip balm base: using a microwave or a double boiler.
When opting for the microwave method, it is essential to use a microwave-safe container, preferably made of glass or ceramic. Cut the Lip Smacker lip balm tubes into small pieces and place them in the container. Heat them in short intervals of 15-30 seconds, stirring between each interval. This will help avoid overheating and burning the balm. For the double boiler method, fill the bottom pot with water and place it on the stove over medium heat. In the top pot, add the chopped lip balm, allowing it to melt slowly as the water heats. It’s crucial to keep both methods under close supervision, especially if children are involved in the process. Ensure to use oven mitts to handle hot containers safely.
- Use a microwave-safe glass or ceramic container for melting.
- Heat in short intervals, stirring frequently.
- In a double boiler, monitor the water level to prevent it from boiling dry.
- Always supervise children during this process.
- Wear protective gloves or use utensils to prevent burns.
Mixing in Flavors and Colors
Creating your own DIY lip balm party favors can be a fun and magical experience, especially when you use the Lip Smacker Disney Princess Flavored Lip Balm Party Pack. To start, you'll want to have your ingredients and tools ready. The base of your lip balm will consist of melted beeswax or coconut oil, which is where flavors and colors will come into play. As you prepare your base, consider the timing and technique for mixing in the flavors and colors for a delightful finish that captures the essence of your chosen Disney princess.
Once you've melted your base, it's time to enhance your lip balms with flavors and colors. Here’s how to do that effectively:
- **Melt the Base**: Begin by gently melting your beeswax or coconut oil in a double boiler over low heat until completely liquefied. This process should take about 5-10 minutes.
- **Add Lip Smacker Flavor**: Once the base is melted, remove it from the heat. Immediately stir in the desired Lip Smacker flavor. Start with a small amount, such as a teaspoon, and adjust based on your preference for sweetness and intensity.
- **Incorporate Color**: After the flavor is well blended, it’s time to add color. Using lip-safe dyes or colorants specifically designed for cosmetic use, add a few drops into the melted mixture. Stir thoroughly until you achieve an even hue.
- **Mixing Techniques**: To ensure optimal distribution of flavor and color, use a spatula or whisk to mix rather than just swirling. This will help prevent any clumping and ensure every batch has a consistent taste and appearance.
- **Pouring into Containers**: Once fully combined, quickly pour the mixture into lip balm tubes or containers, as it will begin to solidify once cooled. Ensure you work swiftly but carefully to avoid spills.
Lastly, allow the lip balms to cool completely at room temperature. Once set, they’ll be ready for your party favors, boasting delicious flavors and fun colors that reflect the enchanting world of Disney princesses. Remember, experimenting with different flavor and color combinations can make each lip balm unique and personalized for your guests!
- **Flavor Variation**: Consider mixing multiple flavors in one batch for a surprise twist!
- **Creative Colors**: Use shimmering or iridescent colorants for a magical effect.
Pouring into Containers
When embarking on the fun task of pouring your Lip Smacker Disney Princess Flavored Lip Balm mixture into containers, precision and care are paramount. Start by ensuring your workspace is well-organized to facilitate a clean and enjoyable process. Gather your supplies: the melted lip balm mixture, small containers (such as tins or lip balm tubes), a funnel or pipette, and some paper towels for any unexpected spills.
Using a funnel is one of the best techniques for minimizing mess while pouring. Simply place the funnel in the opening of your container, which helps guide the mixture directly inside, preventing drips down the sides. If you don't have a funnel, a pipette is an excellent alternative; it allows for precise control over the amount of product you're dispensing into each container. Aim for about 3 to 5 grams of mixture per container, which is generally enough to fill smaller lip balm tins or tubes without overflowing. Before you start pouring, be sure to let your mixed lip balm cool slightly; this will prevent any burns while handling and create a smoother pour.
- Keep a few paper towels handy to quickly clean up any spills.
- Pour gently to avoid creating bubbles in the mixture.
- Fill each container slightly below the rim to allow for easy application and to avoid messy spills once the lid is on.
- Once filled, allow them to set properly per the instructions before sealing.
Cooling and Setting
After crafting your delightful DIY lip balm favors using the Lip Smacker Disney Princess Flavored Lip Balm Party Pack, the cooling and setting process is crucial to achieving a smooth, luscious texture. Typically, it takes about 1 to 2 hours for the lip balm to cool and set completely at room temperature. During this period, the mixture hardens as it transitions from a warm, pourable state to a solid block of glossy, colorful lip balm, ready to enchant any little princess.
If you're looking to expedite this process while still ensuring the quality of your product, there are several methods to consider:
- Place the filled containers in the refrigerator for 15 to 30 minutes. This method significantly shortens the setting time while maintaining the balm's integrity.
- A cold water bath can also be effective—fill a larger bowl with ice and water, and then sit your filled lip balm containers in it. This cooling method prevents the balm from becoming overly hard too quickly.
- If using metal containers, they will retain coldness longer; placing them on a chilled surface can help them cool faster.
Regardless of the method you choose, ensure that your balm has fully set before capping or packaging to avoid any mess. This attention to detail will guarantee a fun and functional party favor every child will treasure!
- Allowing full cool-down is essential for a smooth finish.
- Experiment with different cooling methods to find your preferred speed versus texture balance.
Related Products


Decorating the Party Favors
Transforming Lip Smacker Disney Princess Flavored Lip Balm containers into stunning party favors can turn heads and add a whimsical touch to your event. Start by selecting a color palette that matches the theme of your party. If you're throwing a princess-themed bash, consider using soft pastels like pink, lavender, and mint green to evoke a magical feel. Adorn the containers with thematic stickers featuring iconic symbols such as crowns, magic wands, or even the Disney Princesses themselves. You can easily find gemstone or glitter stickers to add a sparkly effect that will delight every little guest.
Embellishing the containers with custom labels personalized for each guest amplifies the charm. You can design labels with the date of the celebration and the name of the child attending. Using fun fonts and simple images, like hearts or stars, will make it even more appealing. Additionally, consider incorporating mini themed decorations like ribbons or bows around the lip balm tubes. This gift-wrapping technique elevates the presentation and can also align with a princess's royal touch. Don’t forget to include a thank-you tag attached to each lip balm favor as a personal touch that leaves a lasting impression.
- Utilize stickers that reflect the preferences of your guests, such as favorite princesses.
- Add a playful quote or poem that resonates with little ones.
- Consider using washi tape to add vibrant borders around the containers.
Packaging for Gifts
Transforming the Lip Smacker Disney Princess Flavored Lip Balm Party Pack into delightful party favors is an exciting way to add flair to any celebration. Start by selecting your packaging: vibrant gift bags or themed boxes. Gift bags come in various sizes and colors, allowing you to choose one that complements your event’s theme. For a magical touch, opt for bags that feature Disney Princess designs or pastel colors that align with the flavors of the lip balms, such as bubblegum or cotton candy. Fill these bags with the lip balms and sprinkle in a bit of tissue paper or confetti for an extra celebratory feel.
Alternatively, themed boxes can offer a more structured and impressive presentation. A sturdy box with a window display can showcase the colorful lip balms. Decorate these boxes with ribbons or stickers featuring Disney Princesses for the finishing touch. When packaging, consider including a personalized thank-you note or a small toy related to the party theme. This adds a thoughtful element that both kids and parents will appreciate.
- Choose colorful and fun gift bags or themed boxes.
- Fill with tissue paper or sparkly confetti for added pop.
- Decorate with ribbons or stickers for personalization.
- Include thank-you notes or small toys for a thoughtful touch.
Hosting a Lip Balm Party
Inviting friends for a DIY lip balm-making party can create a fun and memorable experience, especially with the Lip Smacker Disney Princess Flavored Lip Balm Party Pack, which includes eight whimsical flavors. To set up for the lip balm station, gather all necessary materials such as small mixing bowls, spoons, pipettes, and containers for the finished products. Organizing the workspace is crucial; consider using a large table covered with a plastic tablecloth for easy cleanup. Each participant should have a designated area to mix their lip balm, and labeling the flavors of Lip Smacker will spark excitement among the kids. Decorate the space with princess-themed items, such as balloons or table decorations, to elevate the atmosphere.
The activities during the party can keep everyone engaged and entertained. Start with a brief introduction to the lip balm-making process, then let the children get creative by choosing their favorite flavors from the party pack. To enhance the experience, consider implementing a “design your own label” station using stickers and markers, allowing each child to personalize their lip balm container. Safety is paramount, so ensure adult supervision throughout the event, especially during the mixing phase. Explain safe practices, like not tasting the ingredients and keeping small items out of reach. Encourage teamwork by allowing the kids to work in pairs to create their unique blends. This collaboration fosters creativity and makes the experience even more delightful for everyone involved.
- Gather all supplies before the party starts for smooth operation.
- Create a designated area for labels and decorating supplies.
- Incorporate themed games or songs to keep the energy up.
- Provide hand sanitizer and emphasize cleanliness throughout the activity.
Why We Chose This Product
I chose the Lip Smacker Disney Princess Flavored Lip Balm Party Pack for this how-to guide because it embodies the perfect blend of creativity and practicality. These delightful flavors not only resonate with kids' love for their favorite princesses but also make for a thoughtful party favor that parents can feel good about. By using these lip balms, you're giving your guests a sweet reminder of the fun they've had while also nurturing their playful spirit.
- Easy and fun to make
- Variety of flavors inspired by iconic princesses
- Practical party favors that kids will love
- Encourages creativity and bonding during the crafting process
In a world where everyone loves a little touch of magic, these DIY lip balm party favors stand out. Spreading joy and beauty while enjoying quality time with friends and family makes this product a fantastic choice for your next event. So grab your Lip Smacker party pack, and let the fun begin!
The Lip Smacker Disney Princess Flavored Lip Balm Party Pack features a delightful collection of 8 lip balms designed specifically for kids. This charming set includes flavors inspired by beloved princesses, making it an ideal party favor for birthdays or themed events. Each balm is not only fun to use but also helps keep little lips moisturized, creating a blend of enjoyment and care. Packaged to capture the hearts of young fans, these lip balms promise to be a hit at any gathering!